Automating Web Actions with Microsoft Power Automate
Recently, I have decided to start writing and blogging regularly. This is why I am writing here. I have been quiet here for a few years and I feel happy to start here again. I hope to keep writing from now on.
This blog post is relevant to something I am currently doing: automating some things on my browser. With a recent upgrade to a new laptop that came with Windows 11, I became interested in Microsoft Power Automate (it was pre-loaded). I have been automating some web-based tasks using it and I thought it might be helpful to share my experience in case anyone else is automating chrome using power automate or looking for a way to automate web scraping.
Power Automate is a tool that can automate repetitive tasks across a wide range of Microsoft and third-party applications, including web browsers. It’s easy to use and doesn’t require any coding knowledge (usually). It is on the cloud and also on the desktop (the one I am using). You can create simple flows that automate common actions, such as opening a browser and navigating to a website, filling out form fields, and clicking buttons.
I find that Power Automate is particularly useful for automating web-based tasks that I would otherwise have to do manually. You can save a lot of time. In this blog post, I’ll just show you how to get started with Power Automate and create a flow that automates some web actions.
Getting Started with Microsoft Power Automate
Power Automate came pre-loaded on my Windows 11 laptop and it’s the desktop version. It still needs you to sign in so you need a Microsoft account to use it. For those of you who don’t have this app installed, you can download it from Microsoft Store.
Our Flow
For our example, we’re going to create a flow that:
- Visits a website
- Checks if the user is logged in; if yes, continues
- Executes some JavaScript code to find some links
- Visits each link one by one
- Types in an input and clicks some buttons
For executing these actions, we need to create a new flow. When you create a flow, the flow designer opens and you can design the flow for whatever actions you want to execute.
First of all, we launch the browser. The browser can be any browser. Currently, it supports Chrome, Firefox, Edge, and even Internet Explorer.
The left sidebar shows a lot of actions that are categorized very well. There is a dedicated category for all the actions involving a browser (Browser Automation).
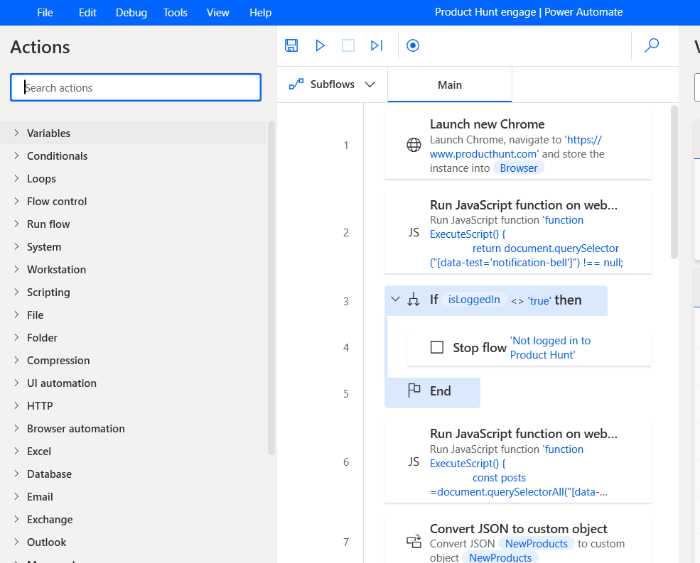
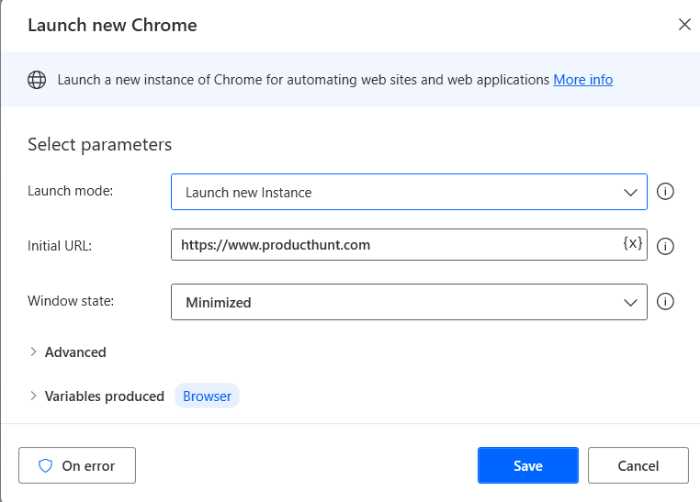
In my flow, I am going to use the Chrome browser. I drag/drop the Launch Browser action into the flow design and it opens a window to set up the options for this action. Every action takes certain inputs and you can set these inputs.
I am visiting Product Hunt and going to scrape the products launched for the current day. So, once the page is loaded, I have two choices:
- Use the built-in action to scrape the data
- Use JavaScript to manually run the code on the page
I decided to go with the first one because I had many things in mind. For simple tasks, the built-in action should be enough.
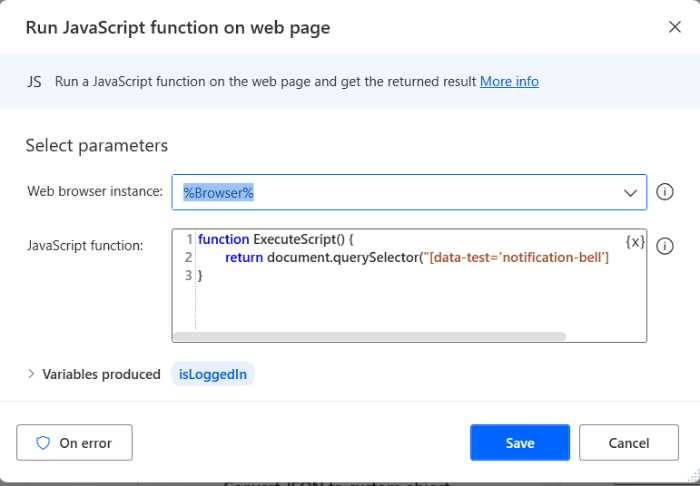
Next, I am checking using JavaScript if I am logged in already. You have access to JavaScript using the browser so that means you can execute any code on the page.
Once I confirm that I am logged in, I execute another action that parses all the links for the products launched on the current day on Product Hunt.
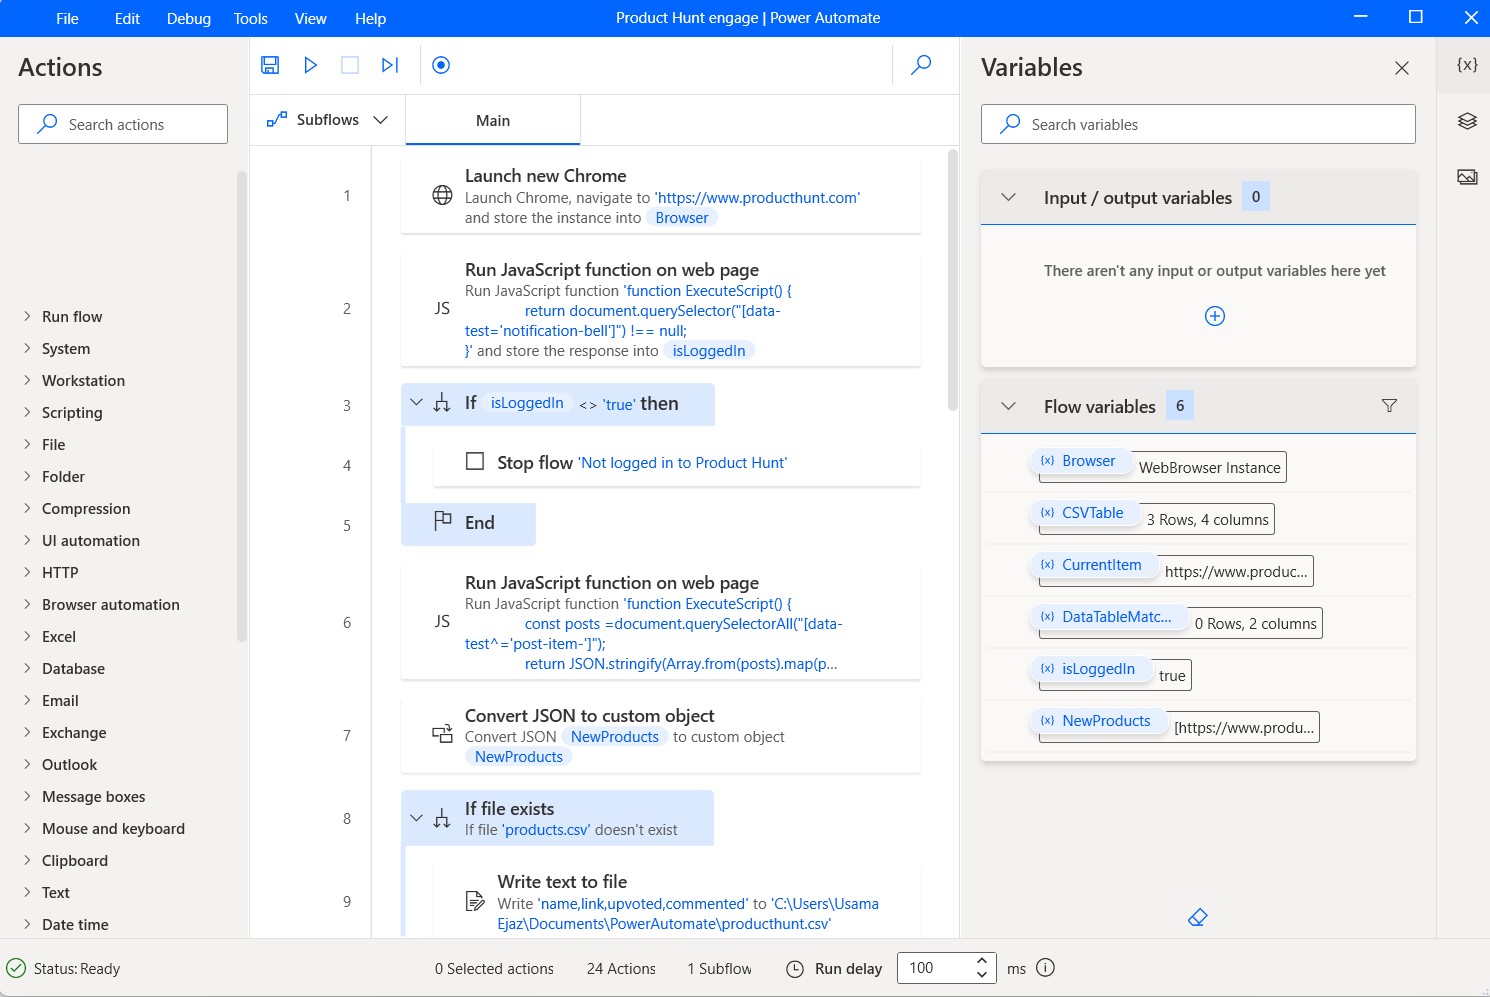
Putting it all together, my flow has 7 actions in it and looks something like this:
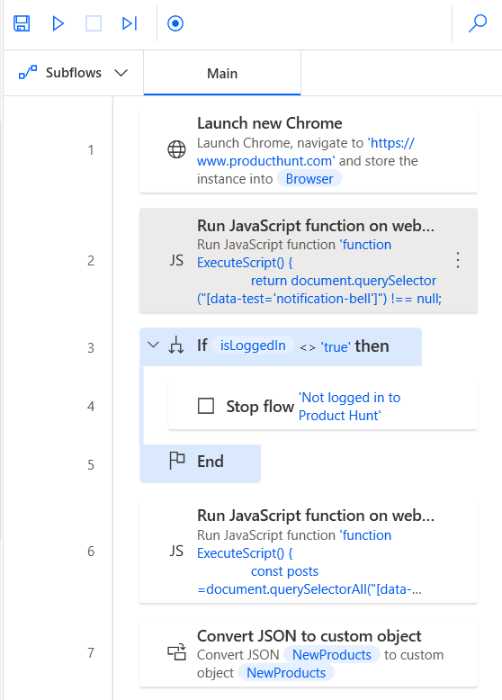
Now, I can save the scraped product links or automate more actions using the browser. I can do whatever I want. I am skipping including screenshots to further actions in my flow but you get the idea: there are many possibilities.
Note: The beauty of using Power Automate is that you can automate any task, regardless of whether it’s on the web or not. This tool is not just limited to automating web tasks.
Happy automation!